


In the gym, “tie” = fasten and set tightness. A leather lifting belt should sit around your natural waist (typically near or just above the navel for squats; slightly lower for deadlifts), feel firm but breathable, and let you take a deep 360° breath to brace. For prong belts, choose the hole that’s snug yet lets you inhale; for lever belts, set the screws once to your size, then flip the lever to lock in. Keep the buckle just off-centre so it doesn’t dig into ribs or hip crease, and use the belt for most working sets, not just PRs.
Shop now:
• Leather Lifting Belts (all styles & colours) → https://www.fitnessfox.co.nz/collections/leather-lifting-belts
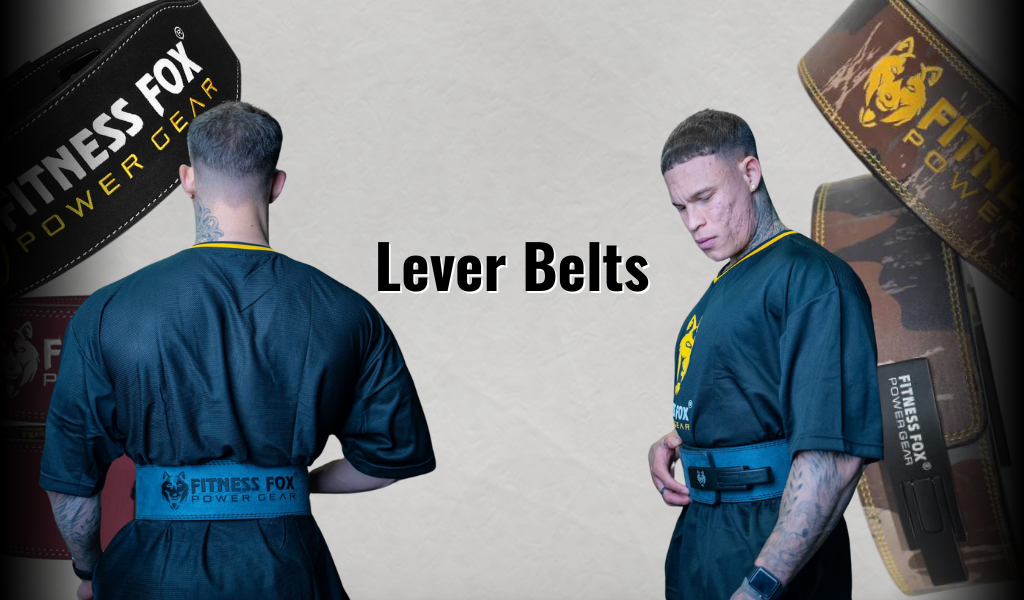
• Lever Belts (flip-and-go fastening) → https://www.fitnessfox.co.nz/collections/lever-belts
• Wrist Wraps → https://www.fitnessfox.co.nz/collections/wrist-wrap | Elbow Sleeves → https://www.fitnessfox.co.nz/collections/elbow-sleeves
Why a Belt Matters (and What “Tying” Really Means)
A leather lifting belt doesn’t make you strong on its own. What it does is help you create pressure inside your torso—so your spine feels supported and your bar path stays consistent. When lifters say “tie a belt,” they mean:
-
Where it sits on your torso
-
How tight it is (one hole tighter isn’t always better)
-
How you breathe and brace into it on each rep
Do those three well and your squat and deadlift will feel instantly more organised and repeatable.

Fit Basics: Height, Hole Choice, and Buckle Position
Height (belt placement):
-
Squat: around or slightly above the navel to support torso angle at depth.
-
Deadlift: often a touch lower (closer to hip bones) for a freer hinge.
-
Shorter torso or deep squatters: a 4″ belt usually feels best.
-
Longer torso or general training: 4″ is still the favourite; 6″ can feel comfy for lighter days—test both.
Hole selection:
-
Start in the middle holes when you’re fresh.
-
If you’re in a hoodie or bulk phase, you’ll likely move one hole looser; tighter layers off? One hole tighter.
Buckle position:
-
Rotate the buckle a few centimetres off-centre so it doesn’t jab ribs or hip crease when you set up.
Tip: Grab a side-on phone pic. If the belt digs into ribs or hips, adjust the height or tightness one notch.
Read more: How Do Lever Belts Work? (Fitness Fox Guide)
How Tight Is “Right”? The 360° Breath Test
A good belt fit allows you to inhale deeply and expand front, sides, and low back into the leather.
-
If you can’t get a full breath, it’s too tight.
-
If you can’t feel the belt when you brace, it’s too loose.
Do this every set:
-
Big breath in.
-
Expand your midsection into the belt all the way around.
-
Lock your ribcage down (no huge rib flare).
-
Move the weight.
This is where the magic happens—pressure before motion.
Read more: how to clean leather belt

How to Fasten Each Style (Step-by-Step)
Single-Prong Leather Belt
-
Thread the tongue through the buckle.
-
Exhale slightly, pull the strap, and choose a hole that feels firm but breathable.
-
Seat the prong and slide the excess into keepers.
-
Take a deep breath; if you can’t expand, go one hole looser.
Why pick it: faster to set than double-prong; classic feel; ideal everyday choice.
Double-Prong Leather Belt
-
Thread the tongue as above.
-
Set both prongs in matching holes (don’t stagger).
-
Check your breath and adjust if needed.
Why pick it: slightly “denser” midsection feel; some lifters love the locked-in sensation.
Quick-Release (Cam) Belt
-
Feed the tongue and pull to target tension.
-
Flip the cam/lever to lock.
-
Unlock between sets, re-lock within seconds—great when you adjust tightness a lot in one session.
Why pick it: fast, repeatable setup with a prong-like feel.
Lever Belt (Flip-and-Go)
-
Off your body, position the lever plate at a hole setting that matches your waist (t-shirt vs hoodie can change this).
-
Screw the lever on (one-time setup).
-
For each set: slide the belt around, hook the post, then flip the lever closed.
-
If clothing changes, re-position the lever one set of holes—takes ~1 minute.
Why pick it: the fastest, most repeatable setup—ideal for heavy top sets and meet prep.
Read more: How to Use a Lever Weight Lifting Belt
Where the Belt Should Sit: Squat vs. Deadlift
-
Squat: Position the belt slightly higher so it supports torso angle without pinching hips at depth.
-
Deadlift: Drop it a touch lower so your hinge isn’t blocked and you can get to the bar comfortably.
-
If it rides up: Try a looser hole or push your breath down and out into the belt.
-
If it pinches the ribs/hips: Move the belt down for ribs, up for hips, and shift the buckle off-centre.
Common Mistakes (and Fast Fixes)
-
Too tight to breathe: Loosen one hole. Bigger breath = stronger brace.
-
Buckle right on your midline: Slide it off-centre.
-
Using it only for PRs: Wear it for most working sets so bracing becomes automatic.
-
Zero back/sides expansion: Think “inflate the ring”—not just the belly.
-
Wrong height: Pinching ribs? Lower the belt. Colliding with hip crease? Raise it or loosen one notch.
Read more: How to Punch a Hole in a Leather Belt (Without Ruining It)
Break-In and Care: Make Leather Last
-
Break-in: Wear the belt for warm-ups and early work sets for the first week; the leather softens and conforms to you.
-
Care: Air-dry; wipe off sweat; occasional leather conditioner if it looks dry.
-
Storage: Keep it flat or loosely rolled—not baking in the car on hot days.

Quick Comparison Table (Choose Your Belt Like a Pro)
|
Belt Type |
Best For |
Setup Speed |
Feel |
Why You’ll Love It |
|
4″ Leather (Single-Prong) |
All-round squat & deadlift |
Moderate |
Classic, stable |
Simple, reliable, easy to size across seasons |
|
4″ Leather (Double-Prong) |
Lifters who like an extra-solid “hug” |
Moderate |
Dense, secure |
Slightly firmer sensation across the torso |
|
4″ Padded Leather |
Long sessions, comfort-first training |
Moderate |
Softer edge feel |
Great for higher-rep days or beginners |
|
6″ Suede/Leather |
Longer torsos, general training |
Moderate |
Broader contact |
Supportive feel when you want more surface area |
|
Quick-Release (Cam) |
Frequent tighten/loosen in session |
Fast |
Firm & repeatable |
Flip to lock; perfect for variable sets |
|
Lever |
Heavy top sets, meet prep |
Fastest |
Rock-solid |
Flip-and-go consistency every single set |
Fitness Fox Picks (Use-Case → Product → Link)
We recommend linking the collection 2–3 times in the article (intro, mid, final CTA), then spotlighting the styles your readers ask about most. Examples:
-
Everyday staple (4″ classic): FITNESS FOX 4" Black Leather Lifting Belt — your go-to for squat and deadlift days.
Shop: https://www.fitnessfox.co.nz/collections/leather-lifting-belts -
Comfort-first (padded): 4" Padded Black Leather Lifting Belt — a touch more forgiving on long sessions.
Shop: https://www.fitnessfox.co.nz/collections/leather-lifting-belts -
Colour pop (still serious): 4" Blue / White–Burgundy / Maroon Leather Belts — performance + personality; match your kit for meet-day photos.
Shop: https://www.fitnessfox.co.nz/collections/leather-lifting-belts -
More torso coverage: 6" Suede/Leather Workout Belt (Black / White) — comfy option for general training or longer torsos.
Shop: https://www.fitnessfox.co.nz/collections/leather-lifting-belts -
Fast transitions: 4" Quick-Release Belt (Yellow) — lock/unlock in seconds between sets.
Shop: https://www.fitnessfox.co.nz/collections/leather-lifting-belts -
Fastest on/off (flip-and-go): Lever Belts — set once, flip to fasten every set.
Shop: https://www.fitnessfox.co.nz/collections/lever-belts
Smart stack: Support the chain from hands to torso:
Wrist Wraps → https://www.fitnessfox.co.nz/collections/wrist-wrap | Elbow Sleeves → https://www.fitnessfox.co.nz/collections/elbow-sleeves
How to “Tie” (Fasten) a Belt in 60 Seconds—Cheat Sheet
Prong Belts (single or double)
-
Exhale a touch → pull strap → pick a snug hole
-
Seat prong(s) → tuck the tail
-
Breathe big; if you can’t expand, loosen one
-
Buckle off-centre to avoid rib/hip pinch
Quick-Release
-
Pull to tension → flip cam
-
Unlock/relock between sets in seconds
Lever
-
Set screws once to your clothing/body size
-
Slide around, hook post, flip lever
-
Re-position screws 1 hole for hoodie vs tee
FAQs
How tight should a leather lifting belt be?
-
Firm but breathable. If you can’t take a deep 360° breath, it’s too tight. If you barely feel it when you brace, it’s too loose.
Where should the belt sit for squats vs deadlifts?
-
Squat: a touch higher (around or above navel) to support torso angle.
Deadlift: usually lower so you can hinge freely.
Do lever belts make you lift more?
-
They set up fast and consistent. The performance boost comes from your bracing, not the hardware—but speed and repeatability help on heavy days.
Single-prong or double-prong?
-
Both work. Single-prong is a hair faster; double-prong can feel a touch denser. Pick what you’ll actually use.
4″ vs 6″?
Most lifters prefer 4″ for freedom at depth. 6″ can feel great for general training or longer torsos. Try placement tweaks before deciding.
Fitness Fox Choice
Lift with a belt that fits, fastens the way you like, and actually helps you brace.
-
Shop Leather Lifting Belts → https://www.fitnessfox.co.nz/collections/leather-lifting-belts
-
Prefer flip-and-go? See Lever Belts → https://www.fitnessfox.co.nz/collections/lever-belts
-
Lock in your setup: Wrist Wraps → https://www.fitnessfox.co.nz/collections/wrist-wrap | Elbow Sleeves → https://www.fitnessfox.co.nz/collections/elbow-sleeves
NZ perks: Free shipping $50+, 30-day returns, Afterpay & Zip. Gear up, breathe big, lift strong.